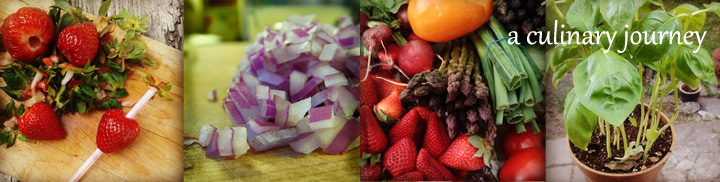
You are currently browsing the category archive for the ‘Tips & Tricks’ category.
With my second book well on the way to being on store shelves, life has returned to some sort of normalcy around my kitchen. That said, I use the term “normal” in a very loose way, because my cooking adventures aren’t of the normal or mundane variety (or at least I like to think that they aren’t).
Yesterday, with that in mind, I decided it was time to clean some of the cupboards. If you happen to be someone who has visited my home then you’ll know that cleaning my cupboards or pantry is far from a simple undertaking and this will be something that takes a few hours each weekend over the next three weeks.
You see, after finishing the writing of my vegetarian, vegan, and gluten-free cookbook for backpackers in February, I had a lot of ingredients that would likely never get used before going off. I went through, checked expiry dates, manufacturing codes, and the like. My goal for the day was to tackle the cans, the baking ingredients and the pasta/rice/legumes cupboards. Three cupboards plus a big bin of speciality flours would be more than enough for one Saturday.
The whole process took about two hours. I used two boxes, a compost bucket, a garbage bag, and the recycle bin. One box was for what I would give away to a friend who has a child on a gluten-free diet. The second was for what would go back into my larder. The compost bucket was for things like legumes for the composter. The rest is self-explanatory. Next thing I knew I had two full bags of gluten-free baking supplies for my friend, a whole heap of things that were well past their expiration. Crackers from 2005? Unopened? Seriously? Then there was the brand spanking new box of Bisquick. I don’t use the stuff, obviously and have no idea how long it had been there. How wasteful! I’m not sure how the crackers or Bisquick got missed in previous throw-outs but they did. This is surprising to me, because I am a stickler for expiration dates.
If you decide to go through the food in your cupboards, which you should do from time-to-time, here are a few resources that I found helpful…
“Best Before” dates, “Packaged On” dates, “Expiry” dates…Oh My!
Still Tasty – The Ultimate Shelf Life Guide
Who needs to pay a professional organizer? Not me, that is for sure. Just a little time and some discipline is all that it takes. That and a big lack of cupboard space—small spaces mean that I have to stay on top of the organization or I just run out of room for storage. Next weekend I will tackle the pantry or perhaps I’ll work on the tea cupboard, fridge, and the chef’s cart full of spices, herbs, and oils.
I finished the afternoon off by making a big pot of Peruvian Chicken and Red Quinoa Soup in order to use up an open package of quinoa that I found. It was yummy and I’ll post the recipe (with photos) sometime in the next few days.
I love pomegranates as they remind me of Christmas and my childhood. Santa always left one in the toe of my stocking. Yesterday when I went to the market they had bags of 5 pomegranates for $1.00. A great deal considering they are usually $2 or $3 a piece here. These were on the reduced rack because the skins weren’t looking so great. They were still nice and firm and heavy. I knew that they would be juicy and ripe.
For years I have struggled with the frustrating task of removing the seeds from their protective pith.
Yesterday when we came home I was watching a holiday special on Food Network Canada. I missed the name of the program but some of the Canadian Food Network Chefs were hanging out and cooking a meal together. Laura Calder, from French Food at Home fame, was preparing an endive and mâche salad with a pomegranate vinaigrette. When preparing the fruit she did it differently than I had seen done before. I tried it this morning and it worked beautifully.
Laura filled a bowl with cool water and then cut the fruit in quarters. She gently removed the fruit under the water. Why this works so wonderfully is that the little gems of fruit sink to the bottom and the pith rises to the surface. Brilliant!
I highly recommend this method. It doesn’t make near as much mess as happens when you tap the fruit out over a bowl.
Turkish Delight has been a favorite in our family for generations. My Mom used to get Fry’s Turkish Delight for me when I was a young child. This morning my little boy, who is a big fan of The Lion, The Witch and The Wardrobe, asked me how to make Turkish Delight.
I showed Tobias a video which uses the same recipe I use. The recipe is included in the video. Here is the link.
Turkish Delight with Natasha Levitan
Sometimes we take this backpacking or hiking as a little treat on the trail.
At holiday time we cover our Turkish Delight in chocolate for added decadence.

building the oven
On Sunday our family celebrated Canadian Thanksgiving, albeit a day early, in Algonquin Provincial Park. Believe it or not, we cooked two turkey breasts in an oven that was made out of a cardboard box lined with foil. Instructions on this are in my wilderness cookbook, A Fork in the Trail, in a small chapter related to campground and base camping.
While Bryan, my darling husband, built the oven I prepared homemade cranberry sauce using fresh cranberries, valencia orange juice, black pepper and sugar. I also made stuffing which consisted of Calabrese style Italian bread, diced/cooked Oktoberfest sausage, onions, apples, crimini mushrooms, salt, pepper and sage. Oh and butter too. I baked this in something called an Outback Oven which is a camp oven for backpackers.

the finished product
I put bits of butter and rubbed sage under the skin of the turkey breasts and placed them in an oven bag and then in a pan. This got placed on the rack we suspended inside the oven. The cardboard box oven ran at 350ºF.
How?
Well you preheat 10 charcoal briquettes in a campfire for 15 minutes and then place them in a pie tin at the bottom of the box. The pie tin has to be sitting up on a few rocks so the air circulates. It is pretty accurate but to maintain the temperature you have to replace the charcoal every hour.
It worked out really well. We also roasted sweet potatoes, baby carrots and baby yellow potatoes over the campfire. I forgot to turn the potatoes so, as you can see from the photo, some of the skins were a little dark.
I also received some big news on the weekend from my publisher. The proposal for my second book, Another Fork in the Trail, has been officially accepted. The trail cookbook will be on the shelves in Spring 2011.
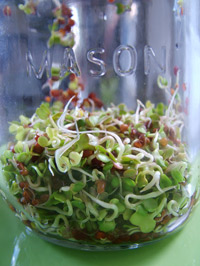
daikon radish sprouts — day four
It’s day 4 for the daikon radish sprouts and I’ve noticed that these grow a tiny bit slower than some of the other varieties I’ve grown. With that said, they should be ready for consumption tomorrow. I can’t wait.
Daikon radish sprouts have a mild radish flavor. Next time I might try China Rose radish sprouts which have a bit more bite. The China Rose variety are also quite pretty with a pink hue.
As you can see, the sprouts have little green leaves and the hulls have fallen away. The volume in the mason jar has also increased. These are going to be delicious on a roast chicken sandwich made with some sort of Artisan or Farmer’s bread.

You must be logged in to post a comment.